G84 Tapping Cycle

The G84 tapping cycle is used to machine threads into pre-drilled holes in a component. It is normally used for rigid tapping. This is a tapping operation that does not use a tapping head but a tap that is held in a standard tool holder. This canned cycle can also be used for peck tapping where we cut a portion of the thread, then reverse the spindle to relieve swarf from the tap and then return to machine more of the thread. This is repeated until the full depth of thread is archived.
G84 rigid tapping cycle
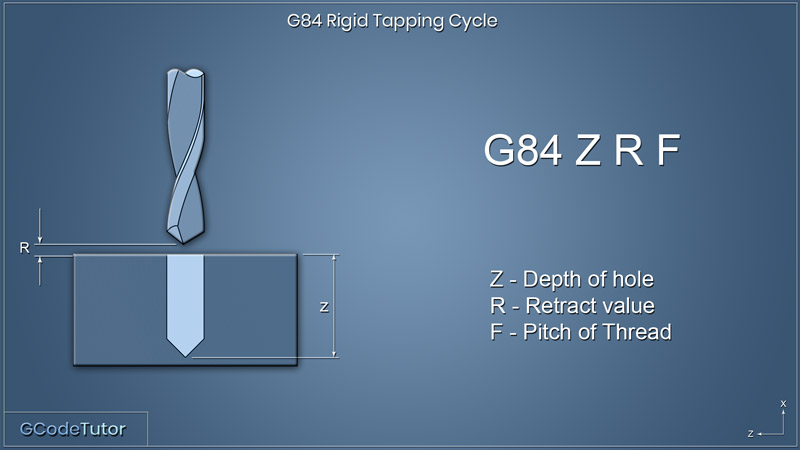
G84 Z R F;
Example:
G84 Z-12.0 R1.0 F0.8;
X50.0;
X50.0;
Y40.0;
G80;
This is the G84 tapping canned cycle in its shortest form. The minimum amount of information needed to be able to machine a thread in a pre-drilled hole on a CNC mill.
A final Z depth of the thread must be given along the pitch of the thread. If the R value (The retract distance from the datum after each thread has been tapped) is omitted the machine will return to the last Z depth defined within the program. The addition of an R value is recommended as this speeds up the tapping operation by not returning to a safe rapid distance but returning to a position closer to the surface of the material. Care must be taken to ensure no clamps are located between holes. If clamps are in the tool path, the addition of a G98 and G99 command can be used to change the hight of the return value to the safe rapid distance on selected holes. This gives us complete control over the return height to avoid obstacles.
G84 peck tapping cycle
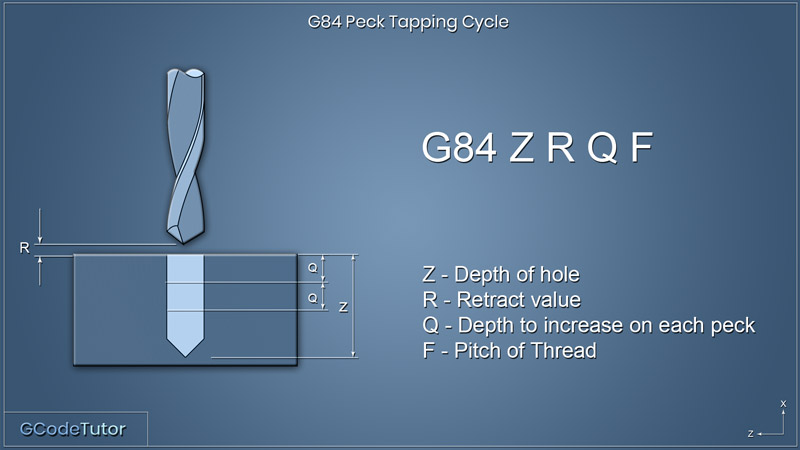
G84 Z R Q F;
Example:
G84 Z-12.0 R1.0 Q3.0 F0.8;
X50.0;
X50.0;
Y40.0;
G80;
The G84 cycle can also be used to peck tap. This procedure taps the hole in stages and is often used for deep hole tapping or when the need to chip swarf arises. Adding a Q value defines the distance of thread that is tapped before reversing the spindle and returning to the R position. The control will then continue tapping the thread by the amount Q until the full depth of thread is achieved as defined by Z.
G84 tapping cycle example
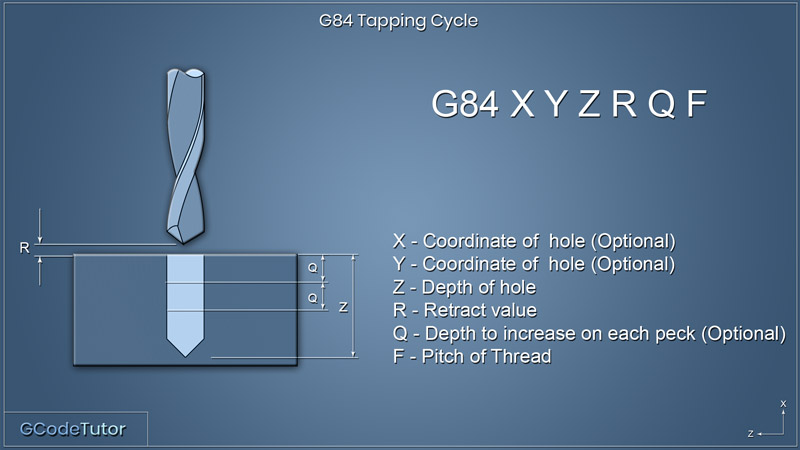
G84 (X) (Y) Z R (Q) F
Full example program:
N5 T0505 (M5 TAP);
M06;
G90 G95 G54 G21 G17 G80;
S300;
G00 X20.0 Y20.0;
Z15.0 M08;
G84 Z-12.0 R5.0 Q3.0 F0.8;
X50.0;
X50.0;
Y40.0;
G80;
G00 Z50.0 M09;
G53 X0.0 Y0.0 Z0.0;
M01;
The program above is an example of a full tapping cycle on a CNC milling machine. We start by calling the tool from the carousel using the T05 word followed by applying the offset 05, M06 is our tool change command that places the selected tool into the spindle. What follows is our safety line that ensures the machine model commands are active in case we stopped the program mid sequence before the tapping sequence was run. The spindle speed is set and we rapid to the position of the first hole. This step is optional as we can also move to this position within the G84 line if needed. A safe working Z height is defined and the coolant is turned on with M08.
The G84 line sets the Z depth of the thread, this can be changed per hole by adding a Z value on the positional blocks. R is our retract length above the surface of the component. Q defines the depth of each tapping peck if we wish to peck tap and finally, F is the pitch of the thread, we are cutting an M5 thread so the pitch is 0.8mm per revolution.
The following X and Y dimensions are incremental positional moves that define the location of the holes this is to be tapped. G80 cancels out tapping cycle and then we move to a safe distance in Z above the part and turn off the coolant with M09. G53 selects our machine datum and moves the spindle in rapid to this position. We end with an optional stop command that gives the operator the option to check the threads with a screw plug gauge if required.
Share this article
For a complete tutorial on CNC mill Programming check out my course.
The quickest way to learn CNC Programming

