Punch Tapes Explained
The above video lesson is part of my G-Code tutorials that I recorded with Practical Machinist. More can be found here
What are punch tapes?
Way back in 1991, when I started my apprenticeship. The company that I worked for still used punch tapes (often known as paper tapes or puncher tapes) to store their NC/CNC programs.
Punch tapes are a reel of narrow paper with holes that tells the tape reader the information contained in our program.
Each line represents a single letter or number that when passed through a light source can be read by our machine and then the data is fed into the RAM and stored as a program.
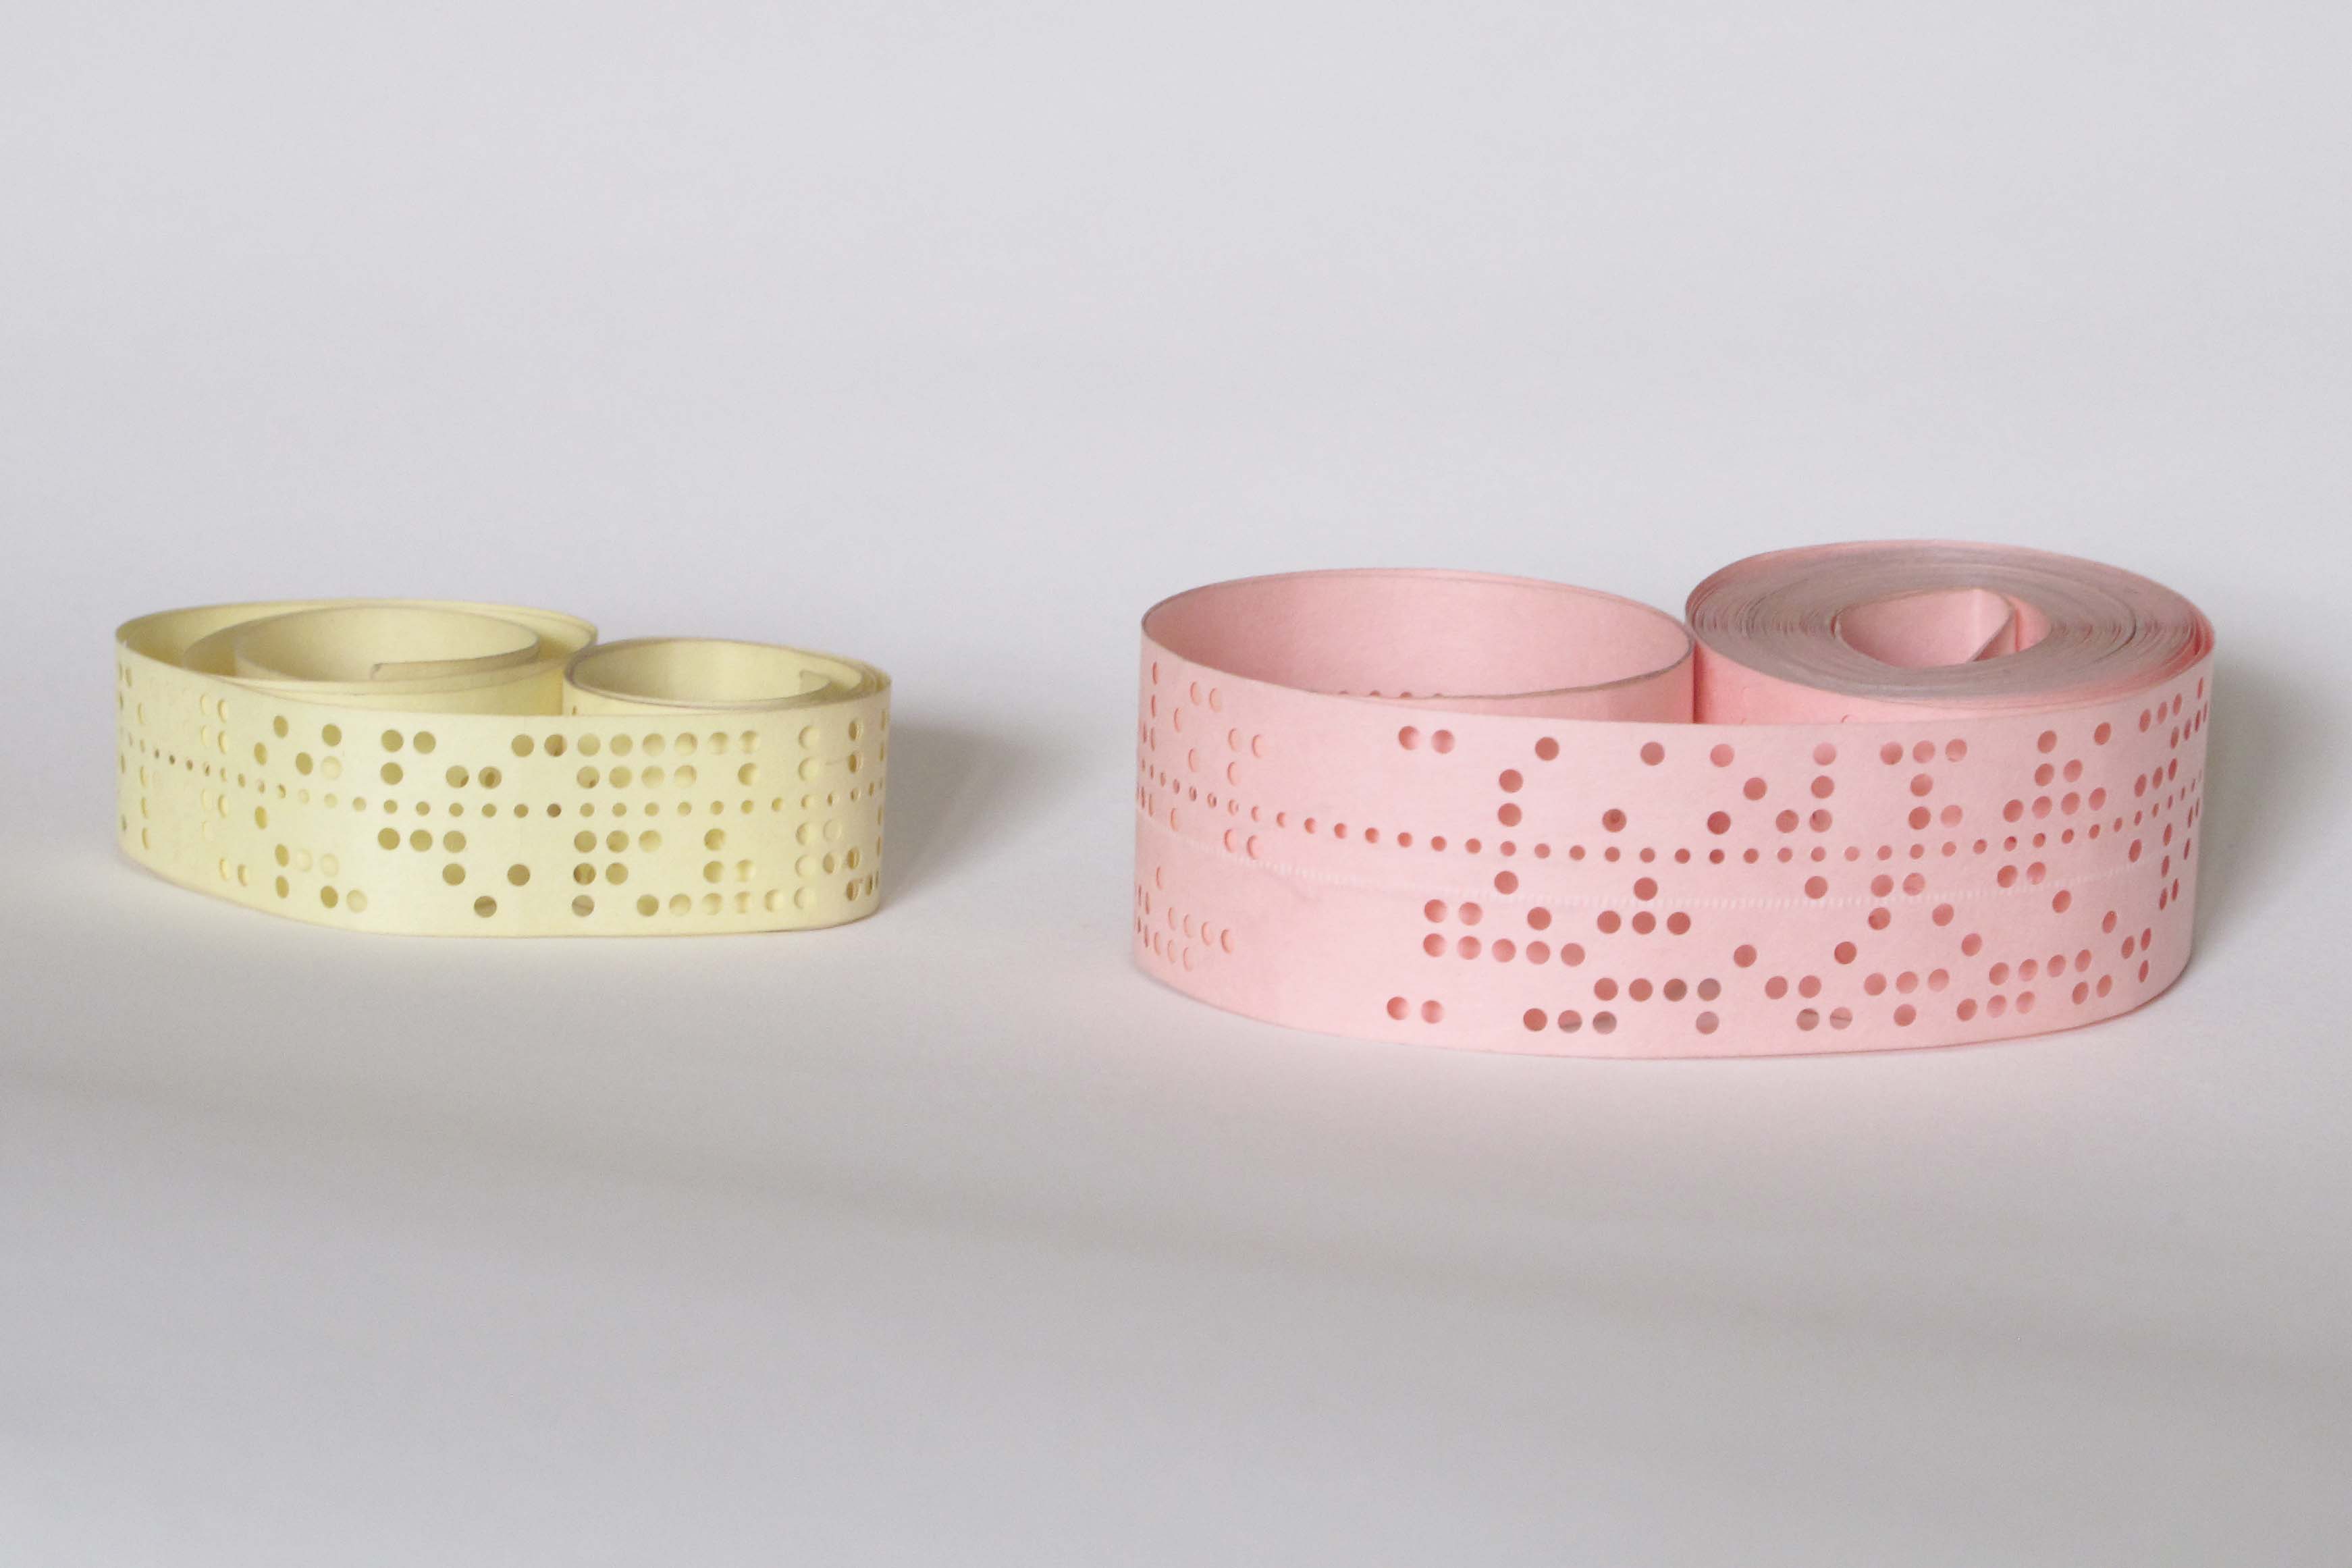
To produce a punch tape, we would link up a tape machine to our CNC controls and export the program in a process known as 'punch'. Often, today we may refer to CNC programs as Tapes and the file extension is often .TAP for some older machines instead of .NC or .TXT
The amount of data stored on these tapes is very small compared to modern-day data storage. Each hole is one bit of information, and each line is one byte. So a punch tape is reading eight bits per bite. To compare that to your one terabyte hard disk drive, a terabyte is 1000000000000 bytes of information. or one trillion lines of holes on a punch tape.
How to read a CNC punch tape
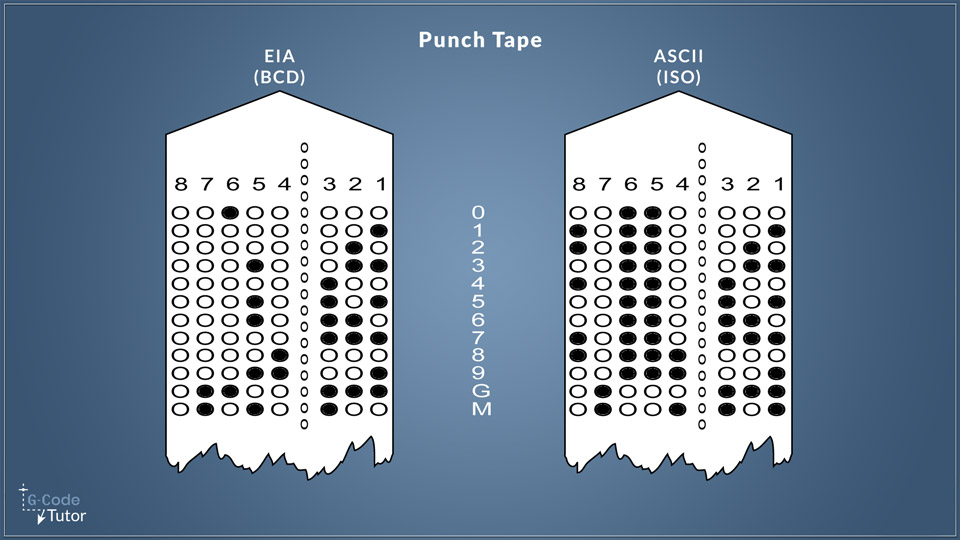
Before we can read a punch tape, we have to identify which of the two types of formats we are reading. Is our tape EIA or ASCII?
This is a simple process as EIA tapes will have an odd number of holes and ASCII will have an even number (See the image above). The line of smaller holes that run down the length of our tape is used to feed the tape into the reader and is not used as part of the program.
If our tape reader is expecting an EIA tape and sees an even number of holes on a line of code, it will call up a reading error, alerting the operator that the wrong mode is selected.
When holes are being punched into our tape, for example, we have a program in ASCII format that requires an even number of holes, but our program has an odd number for a line, it would add an extra hole into row 8. and for EIA there would be an extra hole punched into row 5.
The image above shows numbers from zero to nine and also G and M so we can compare and see the difference. Numbers can be easily read by humans but the letters are a little more complicated and it does change between the formats.
If you're familiar with the ASCII system, where on some keyboards, we don't have all the characters on the computer keyboards. So we would use alt and then a series of numbers to get a character that's not usually on our keyboards. This works the same way.
Luckily machinists never had to read these paper tapes by eye, but some of the machinists that ran the machines for years started to get a bit of a feel for it, And quite a few could actually read these by eye as they scanned over them and make adjustments.
The tape reader machine processes the tape by shining a light to a light receiver, as the tape passes over the light source the light sensors read the pattern much like the old automated pianos would read the music from a paper score. This was not a foolproof method as often the machine would miss read the program. Because of this, it was advised for the machinist to read through the entire program once it was in the machine memory to check for errors.
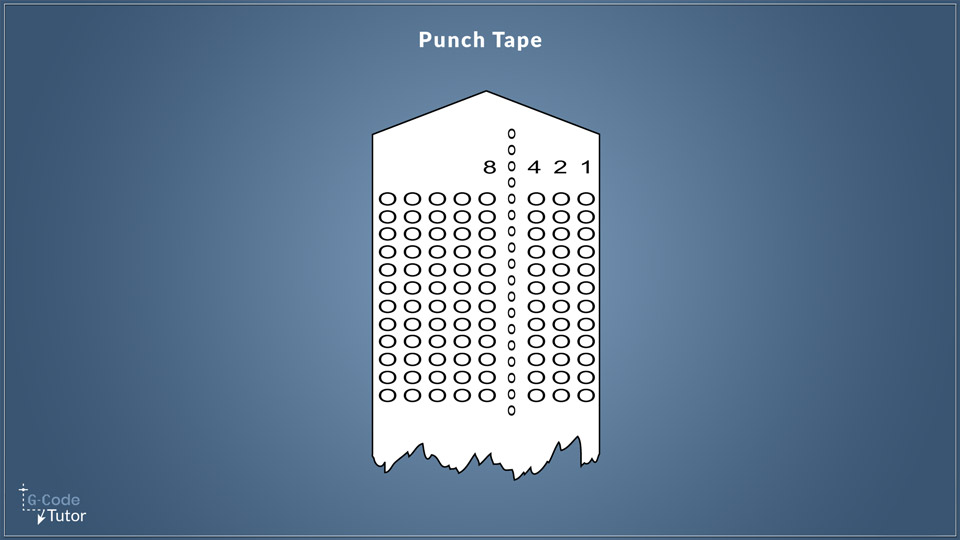
To read the tape above, I have exchanged the hole numbers with their value using the binary system. so if we have a hole in the far right position, our reader would read the number 1. If we had a hole in the line next to it as well, we would have the value 3 and so on.
Editing punch tapes
When it comes to making adjustments to our programs, we had two options. Either throw the tape away and punch a new one with the adjusted program or edit the existing tape.
If we edited the existing tape, we would cut and splice the tape back together using sticky tape. We would quite literally cut and paste our program tape.
To remove a part of the program we would cut the tape in the right place and join it back together. To add a section to the program we would punch the new section, then cut the paper tape in the correct place, then using sticky tape we would stick the new part of the program in place.
This often gave us issues as when we joined the tape back together we had to aline and space it perfectly or the tape reader would fail to read it correctly and often give us wrong code or refuse to read the tape altogether.
Share this article
For a complete tutorial on CNC mill Programming check out my course.
The quickest way to learn CNC Programming
